
Have you ever tried searching for your ancestor’s name in online records?
FamilySearch, FamilySearch partners,and volunteers worldwide have worked to make over 3 billion records easily findable online with a very simple name search. But did you know that these indexed records represent only 20 percent of the historical records FamilySearch has available online?
If you haven’t found your ancestors by using the main search formon FamilySearch.org, it may be that their information is locked inside a waiting-to-be-indexed digital image. In 2018 alone, FamilySearch added over 432million new record images to its online collections. But it can take years to catalog and index these images so they can be readily searched.
Fortunately, the tools for finding the record image you need online are improving dramatically. Well ahead of any formal indexing or cataloging, the new FamilySearch Explore Historical Images tool can help you find records about your ancestors more easily, even when their information is not text-searchable and seems to be locked inside a digital image.
An Image-Centered Search Experience
Explore Historical Images marks the beginning of a new and different search experience. With this tool, images produced from FamilySearch’s 300+ digital cameras worldwide is made almost instantly available.
Explore Historical Images helps you navigate to images of historical records that could contain information about your ancestors. Although you aren’t able to search for your ancestor by name directly, you are able to narrow your search by place, date, and other information that was captured when the image was taken.
To try out the tool, head over to FamilySearch.org,and click Search and then Images in the main menu. Then follow these steps:
1. Search for Records from a Specific Place
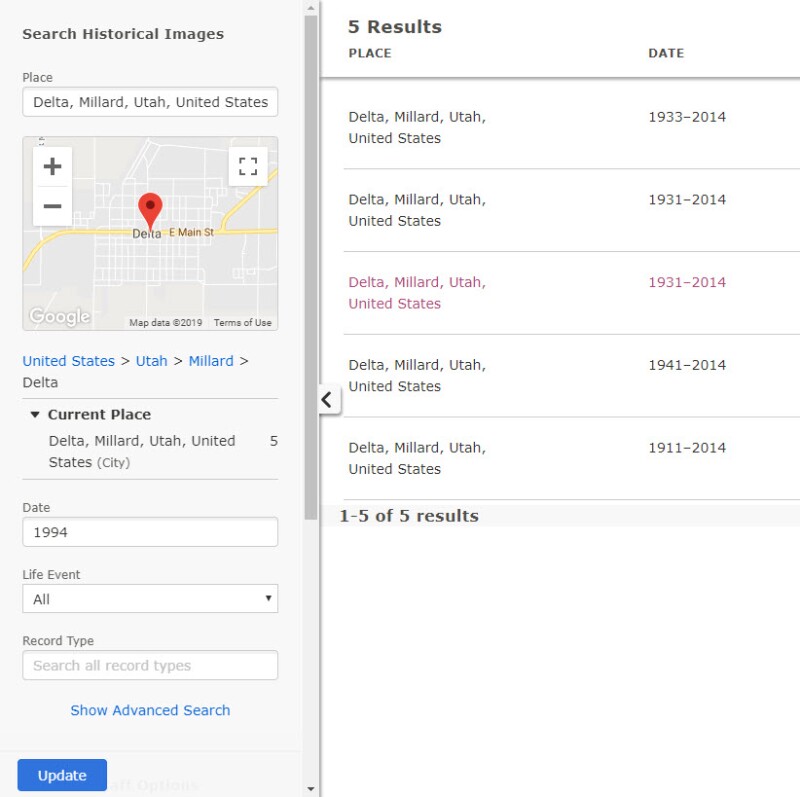
Start by typing in a significant place for your ancestor(for example, where the person was born, wed, or buried).

To narrow your search, you can also add a date (or date range), life event, and other fields (using the advanced search). Then click Search Image Groups.
Tip: As you are typing, click the suggestions for standardized dates and locations for more accurate results.
2. Pick a Record Collection to Browse
Explore Historical Images searches the basic information that was captured for billions of image-only records and gives you a list of relevant record collections.
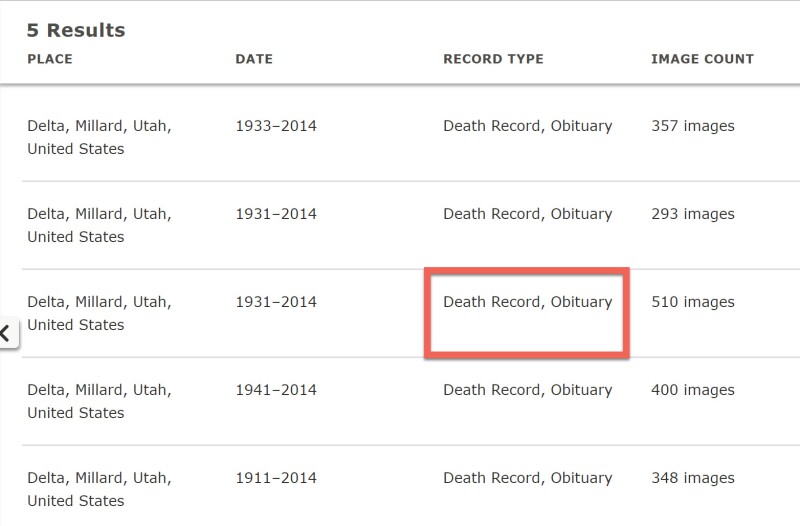
For example, a search for “Delta, Millard, Utah” for the year 1994, I found collections of obituaries from the period 1933–2014. These images haven’t been indexed yet, but I can browse them to find my ancestor.
Which Collection Do I Choose?
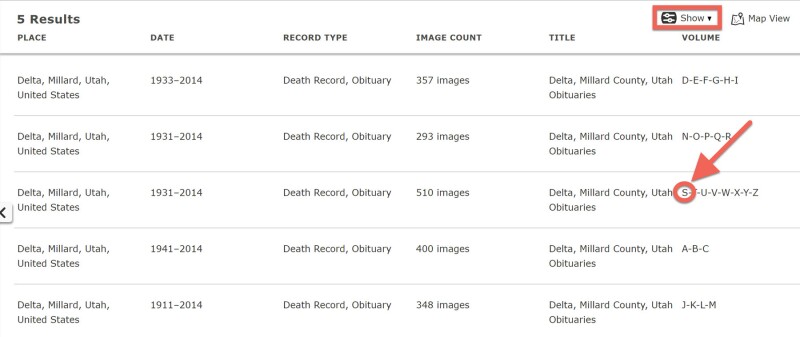
Explore Historical Images shows you the relevant record collections it finds. To learn what is in each collection, look at the basic information that was gathered when the images were taken.
Different columns may show you the place, type of record,dates, and volume information for the collection. You may find collections with vital records (birth, marriage, and death records), church records, civil records, military records, population counts, and more.
Tip: To toggle columns on and off, click the Showbutton in the top right.
In our example, the obituaries from Delta, Utah, show volumes that are separated alphabetically. Because of this structure, the correct record set was easy to find.
Tip: If you have too many results or too few, use the left side bar to narrow and broaden your search. Add or take away dates, use the map to see nearby locations, and click on location links to widen or narrow the area you are searching. Then click Update.
Sometimes record collections in your results may appear to be the same at first, but you’ll find as you explore them that each one is unique. Even if the basic information isn’t very descriptive, don’t be afraid to click a result to see what it contains!
3. Browse Record Images
Once you pick an image collection, a browsing window shows you thumbnails of each image. Looking at these thumbnails, you may see indexes,section markers, or title pages that can help you learn more about what is in the record set.
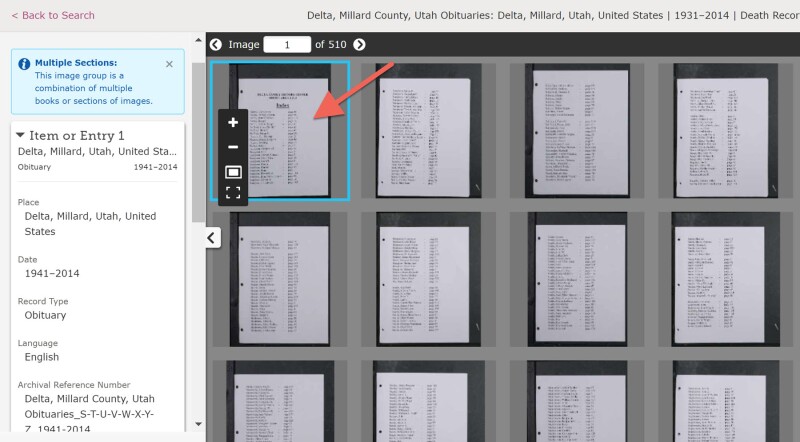
In our obituaries example, the index at the beginning was organized by last name and showed the exact page that showed my ancestor’s record.

Explore Historical Images lets you zoom in on each image and flip through images quickly. Using the image number box, you can skip through the images by any number to become familiar with how the records are organized. You can also use the arrow buttons to scan each image for your ancestor’s name.
Note: At first, the number of records that Explore Historical Images gives you to sort through may seem large. This feature will be refined over time to reduce the number of records you may need to browse if your ancestors are in the image-only collections.
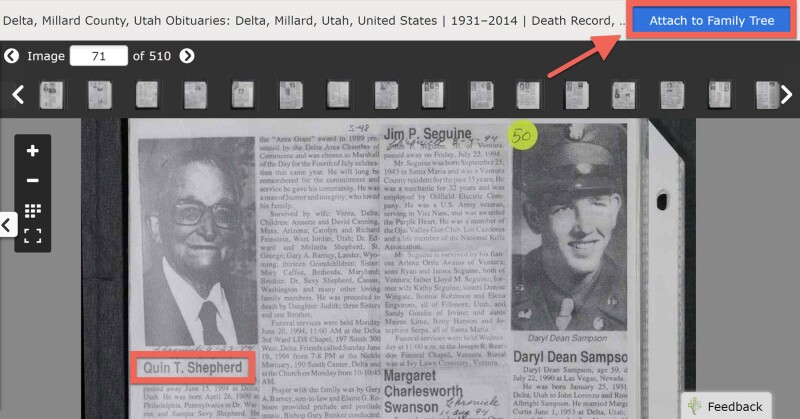
4. Attach Relevant Records
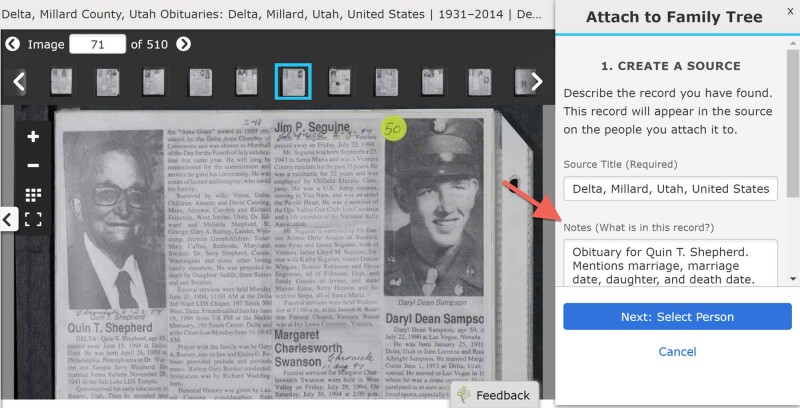
When you find a record image that is relevant for your ancestor, use the blue Attach to Family Tree button in the upper right to attach it to your ancestor’s profile in Family Tree.
As you add this source to your relative’s profile, you can also note important information on the image so you and others can read it more easily.
Explore Historical Images can help you discover new information about your ancestors that might not be made searchable online for years to come. If you haven’t been able to find needed records by doing text-based searches, try out the new Explore Historical Images tool. It may be that the record you need was only recently made available, and Explore Historical Images can help you find it.
