FamilySearch Wiki:WikiProject Creating an Affiliate Library Page
Purpose[edit | edit source]
To assist FamilySearch Affiliate Libraries create a page on the FamilySearch Research Wiki. Below are instructions needed to create an individual library Wiki page.
Contact[edit | edit source]
If you have any questions about editing or would like training on how to edit the Wiki, please contact: Amber Larsen: [email protected]
Example[edit | edit source]
An example of an affiliate library Wiki page: Allen County Public Library
**NOTE: Before you are able to create a page for your library, you must first have a FamilySearch Account with editing rights. To obtain editing rights, make sure you have visited a few Wiki pages while logged-in to your account (this helps the platform recognize you as a Wiki user). Once you have visited a few Wiki pages, fill out this form to be granted rights to edit the Wiki.**
Instructions - Create Affiliate Library Page[edit | edit source]
Step 1 - Title/Create the Page[edit | edit source]
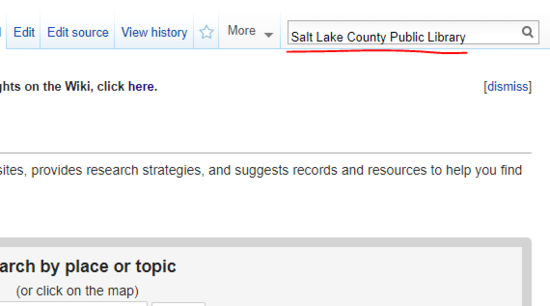
1. To create a library page, in the search box on the top-right hand of the Wiki, search for the exact wording as you would like your page to be titled (including capital letters).
NOTE: if you find there is another library with the same name as yours, add in parenthesis the location of your library. For example, the article title would be: Washington County Library (St. George, Utah).
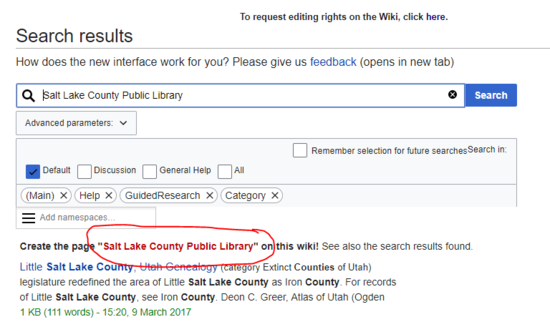
2. When the search is conducted and it pulls up the results window, right under the search box, there should be a phrase saying "Create the page on the Wiki!" with a red link spelled the way you searched. Click on that red link, and it should bring up a page with a large, blank, typing field.
Step 2 - Add Page Layout[edit | edit source]
1. Copy the code below, and paste it into that blank field as you are creating your page:
{{subst:Affiliate-libraries}}
2. After pasting the above code into the field, scroll down to the bottom of the page, and click, Save page. You'll see that the layout of the page has been created, providing space for you to add your own content.
3. To add the content to the page, use the VisualEditor by clicking the "Edit" tab option near the top-right search bar.
For an example of a library page on the Wiki, see Allen County Public Library
Additional Instructions:[edit | edit source]
1. Fixing the breadcrumb
- At the very top of the page is a breadcrumb (a series of page locations/jurisdictions separated by arrow icons).
- Click on "Edit" to open Visual Editor.
- Where it says "STATE NAME", replace that text with the name of the state/province of your library. Replace "COUNTY NAME" with the equivalent information, and replace "NAME OF LIBRARY" with the full name of your library.
2. Formatting an address
- When adding your library's address and contact information, use the following format:
NAME OF INSTITUTION
Address
Address
Address
Telephone: #######
Email: INSERT EMAIL HERE
Website: WEBSITE URL HERE
(Optional) description of institution and services/accessibility.
3. Adding external links
- Click "Edit", highlight text you want to make either an internal or external link, then click the link icon (it looks like two pieces of a chain link. This icon is located just to the left of the "Cite" dropdown in the Edit menu bar). As you click the link icon, a dropdown menu will appear.
- "External link" tab is for entering the URL of the external link (a link going to another site besides the FamilySearch Wiki).
- Click "Done" when finished
- Click "Save page" in the VisualEditor tool bar.
More instructions on how to edit using VisualEditor are found on the Wiki University.
If you have additional questions about editing on the Wiki, please contact: Amber Larsen: [email protected]
Optional Instructions[edit | edit source]
Linking to FS Affiliate Libraries Page[edit | edit source]
NOTE: This option can only be done if you have already created your Affiliate Library's page following the instructions above.
1. Go to the FamilySearch Affiliate Libraries page, and check to see if your Library is already listed. If your Library IS listed already, click "Edit" next to the heading on the page, and skip to Step 6 in this section.
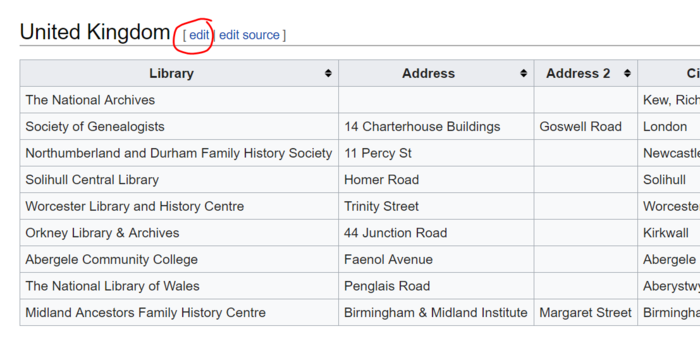
2. If your library is NOT listed on the Affiliate Libraries page, navigate to the appropriate geographic region that your Library pertains to, and click the "Edit" button next to that heading (see example below).
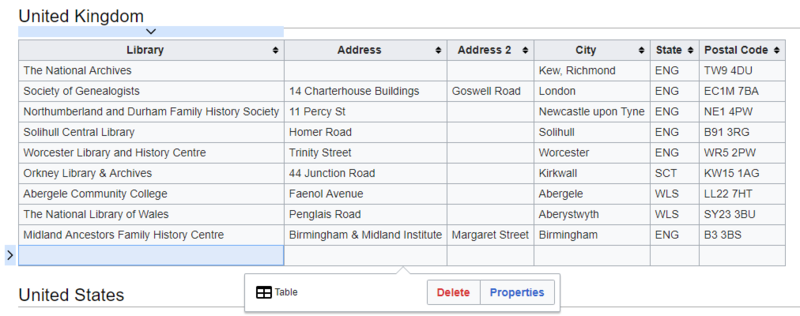
3. Click on the bottom-right cell of the chart that you would like to put your Library in (see below).
4. Once you have clicked on the bottom-right cell of the chart, hit the "Tab" key on your keyboard. This should begin a new row in the chart.
5. Now that you have a new row, fill out the respective fields with information about your Affiliate Library.
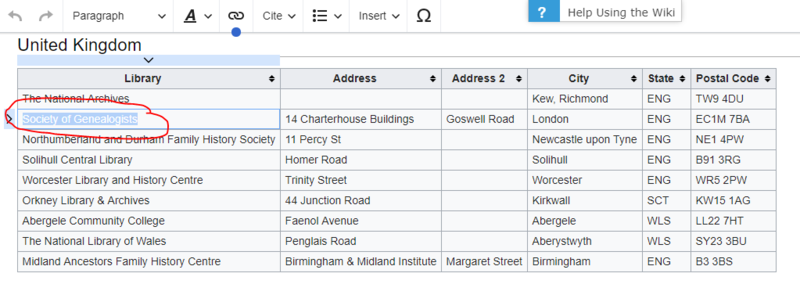
6. Next, you will add a link from this page to your Library Wiki page. Highlight all the text for your Library in the Library column. (This should just be the name of your Library)
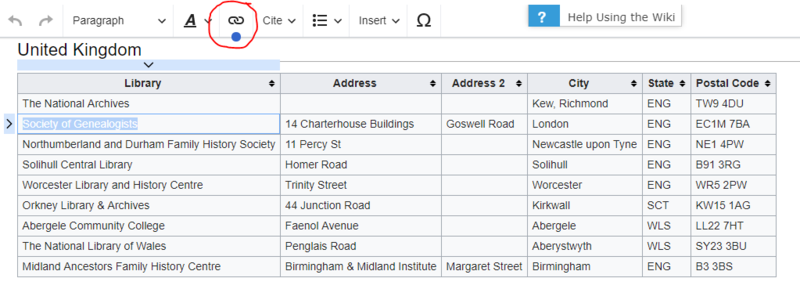
7. With the title of your Library highlighted, click on the Link button in the top menu.
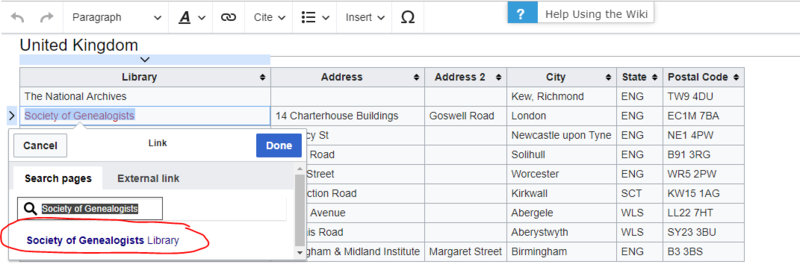
8. As you click on the Link button, it should automatically search the Wiki for your Library's page. (see example below). Click on the result if it is your library.
9. After you've clicked on the result for your Library's page, navigate up to the top right-hand corner of the page and click on the blue "Save changes..." button.
How to Add an Image[edit | edit source]
Submitting an Image to the FamilySearch Wiki for Approval[edit | edit source]
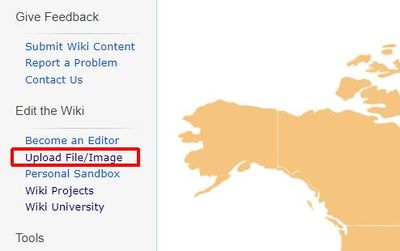
1. Click the upload file/image link on the far left menu.
2. Fill out the form on the page and then click send file at the bottom of the page.
3. Someone from the FamilySearch Wiki team will upload your file and notify you when it's ready.Please allow up to four business days for us to respond.
Adding the Image to Your Page[edit | edit source]
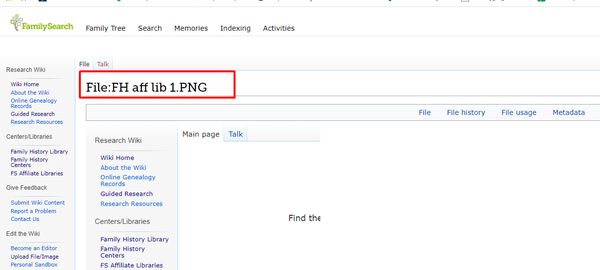
1. Open the page the image is on in your browser.
2. The name of the file will be at the top of the page. Copy the name onto your clipboard.
3. Go to the page where you want to add the image.
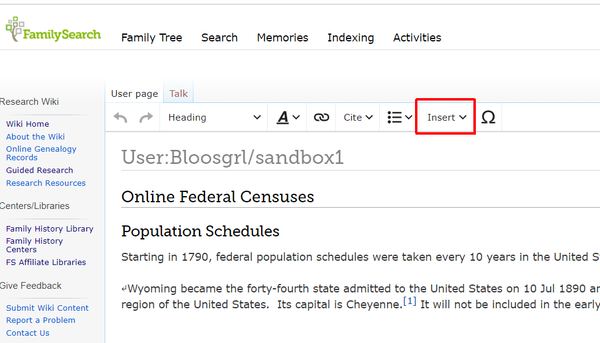
4. Click the edit tab close to the top of the page.
5. Place the cursor where you want the image to be on the page.
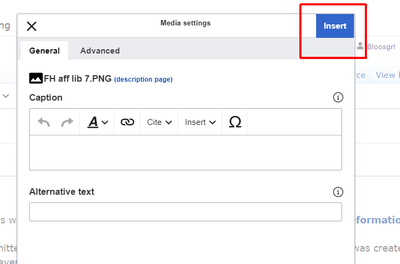
6. Click insert.
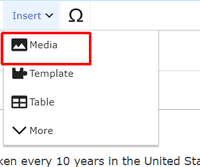
7. Select media.
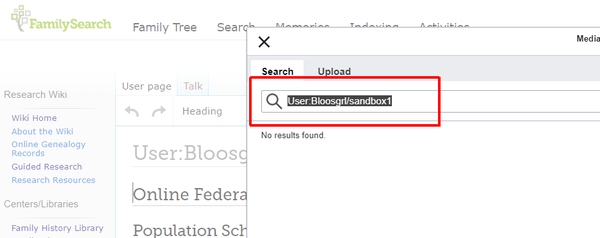
8. Paste the name of the image file in to the search box.
9. Select the image you want to use by clicking on it and click the blue button that says "use this image".
10. Add a caption, if wanted and click insert.
11. Click Save changes.
